アプリへのディープリンク
このページを読むとどんなことができるようになるのか
このチュートリアルが完了すると、デモアプリケーションは二つの異なるURL(birdland://home と birdland://about)に対応できるようになります。birdland://homeは“home”の項目へ、 birdland://aboutは“about”の項目へそれぞれユーザーを誘導します。
なぜこれがアプリケーションで必要なのか
Twitter カードを使用すると、コンテンツの一部をあなたのアプリケーションの特定のコンテンツにディープリンクすることができます。 この機能はとても強力なので、既にあなたのアプリをインストールしているユーザーの注目を引くことができます。 アプリケーションをインストールしていないユーザーの場合はAppストアへのリンクが表示されるので、簡単にアプリをダウンロードしてもらうことが抱きます。
実装方法
ステップ 0 - 前のチュートリアルを完了させる
前のチュートリアルでは、カスタム URL スキーム birdland://を iOS アプリケーションに追加しました。
このチュートリアルは前回の結果を基に作業をするので、以降を読み進める前にそれを完了させるようにしてください。
ステップ 1 - ディープリンクのパスを決める
今回の例では、アプリケーション内の二つの項目“home” と“about”に直接アクセスできるようになります。 When combined with the custom scheme, this will create two ways to deep-link into the application: “birdland://home”, and “birdland://about”.
ステップ 2 - Add support for URL routing
前回のチュートリアルで作成したプロジェクトを開きます。次に、アプリのUIApplicationDelegateの実装ファイル、“AppDelegate.m”を開きます。
We’re going to add a new method, openURL, that will handle URLs that are opened by our application.
 -(BOOL) application: (UIApplication * ) application openURL: (NSURL * ) url sourceApplication: (NSString * ) sourceApplication annotation: (id) annotation {
     if ([url.scheme isEqualToString: @"birdland"]) {
         // check our `host` value to see what screen to display
         //TODO you can also pass parameters - e.g. birdland://home?refer=twitter
         if ([url.host isEqualToString: @"home"]) {
             [self.viewController presentHomeScreen];
         } else if ([url.host isEqualToString: @"about"]) {
             [self.viewController presentAboutScreen];
         } else {
             NSLog(@"An unknown action was passed.");
         }
     } else {
         NSLog(@"We were not opened with birdland.");
     }
     return NO;
 }
ステップ 3 - UIの実装
次に、ビューコントローラーに簡単なメソッドを二つ追加します。ViewController.m を開いて以下コードを追加してください:
#import "ViewController.h"

#define THE_CREATOR @"Your-handle-here!"

@interface ViewController()

@property(nonatomic, strong) UILabel * viewLabel;

@end

@implementation ViewController - (void) viewDidLoad {
    [super viewDidLoad];
    self.viewLabel = [
        [UILabel alloc] initWithFrame: self.view.frame
    ];
    self.viewLabel.textAlignment = NSTextAlignmentCenter;
    [self.view addSubview: self.viewLabel];
    [self presentHomeScreen];
} - (void) presentHomeScreen {
    NSLog(@"'Presenting' the home screen.");
    self.viewLabel.text = @"Welcome home!";
} - (void) presentAboutScreen {
    NSLog(@"'Presenting' the about screen");
    self.viewLabel.text = [NSString stringWithFormat: @"About: created by %s", THE_CREATOR];
} - (void) didReceiveMemoryWarning {
    [super didReceiveMemoryWarning];
}

@end
You’re doing all the hard work here, so update the value defined for THE_CREATOR to be your Twitter handle.
ステップ 4 - ビューコントローラーのインターフェースを更新する
では、ビューコントローラーのインラーフェースファイルである ViewController.hを更新します。以下のように変更してください:
#import <UIKit/UIKit.h>

@interface ViewController : UIViewController

- (void)presentHomeScreen;
- (void)presentAboutScreen;

@end
動作確認を行う
まず最初にアプリケーションをビルドして実行し、全て正しくコンパイルされてることを確認してください。以下のような画面が表示されるでしょう:
それでは、登録したURLスキームの動作を確認するためにモバイル Safariを起動します。 ホーム画面に戻るために、シミュレーター上で“Home”ボタンを押してください(もしくは commandキーとshiftキーとHキーを押してください)。 そして Safariを起動してください。
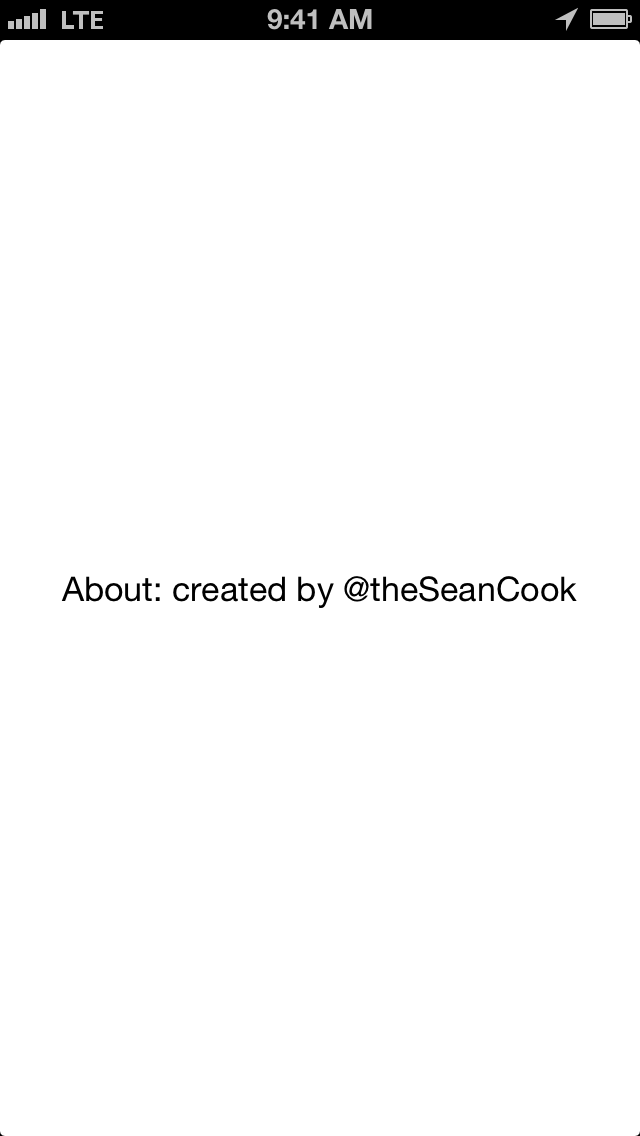
次に、Safariのアドレスバーに “birdland://about” と入力します。 Goボタンを押してください。about の項目が表示されるでしょう:
このチュートリアルの内容をあなたのアプリケーションに適用する
このチュートリアルの内容をあなたのアプリケーションに適用するには、まずディープリンクを使ってユーザーをアプリのどの階層に誘導するかを決める必要があります。 適用するにあたって、いくつの簡単な質問があります:
- アプリ内でユーザーはどのように画面移動しますか?
- How does the user view a single piece of content in your app?
- ユーザーを誘導したい特定の項目はありますか?
- Finally, if a user shares a piece of content to another user, what’s the experience you want the second user to receive?
実際にあなたのアプリで実装する場合はここで説明しているよりももっと難しい作業になるでしょうが、全体的な流れは同じです。

