データストアにデータを保存する
この項目では、挨拶文を投稿する機能とこれまで投稿された挨拶文を表示する機能を追加して、先ほど作成したシンプルなアプリケーションを拡張します。 データの送信と保存を行うフォームを制御するサーブレットを追加します。
使用するデーターストアは、 Google クラウドデータストアです。 拡張性があり、信頼性の高いデータストレージサービスです。App Engingeから簡単に使用できます リレーショナルデータベースと違い、Datastore はスキーマレスなオブジェクトストアで、インデックスベースのクエリーエンジンとトランザクション機能を持っています。
このチュートリアルでは、Datastore用のJavaデータモデリングライブラリであるObjectifyライブラリを使用します。 これには使用できる代替APIがいくつかあります。: シンプルな low-level API、Java データオブジェクト (JDO)の実装と Java Persistence API (JPA) インタフェース、Slim3 ライブラリ。
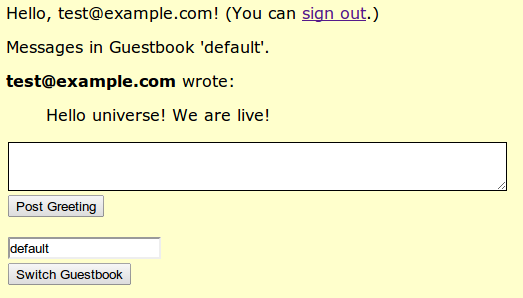
メッセージ送信フォームを追加するとあなたのアプリは以下のようになります:
既存にアプリケーションに以下の変更を加えます:
- Objectifyを設定し、guestbook用のデータモデルクラスを作成します。
- JSP のページを編集して、ユーザーがデータストアに挨拶文を投稿し、現時点で保存されている全ての挨拶文を表示できるようにします。
- 送信フォームを制御する
SignGuestbookServletという名前のサーブレットを新規に作成します。 - 新しく咲く瀬下サーブレットにリクエストとルーティングされるよう
web.xmlにエントリーを追加します。
Objectifyを設定する
Objectify ライブラリを使用するには、Maven でインストールができように、pom.xmlファイルにdependency を宣言しなければなりません。
アプリケーションのルートディレクトリ(guestbook/)内にある pom.xmlを編集し、 <dependencies> 項目を探し、以下を追加します:
<dependency>
    <groupId>com.googlecode.objectify</groupId>
    <artifactId>objectify</artifactId>
    <version>4.0.1</version>
</dependency>
Maven will install the library the next time you run a target that needs it (such as the development server).
In order to use Objectify in a JSP, we need a helper class that registers the model classes in the JSP servlet context.
guestbook/src/main/java/com/example/guestbook/内で、以下のような中身でOfyHelper.javaという名前のファイルを作成してください:
package com.example.guestbook;

import com.googlecode.objectify.Objectify;
import com.googlecode.objectify.ObjectifyFactory;
import com.googlecode.objectify.ObjectifyService;

import javax.servlet.ServletContextListener;
import javax.servlet.ServletContextEvent;

/**
 * OfyHelper, a ServletContextListener, is setup in web.xml to run before a JSP is run.  This is
 * required to let JSP's access Ofy.
 **/
public class OfyHelper implements ServletContextListener {
  public void contextInitialized(ServletContextEvent event) {
    // This will be invoked as part of a warmup request, or the first user request if no warmup
    // request.
    ObjectifyService.register(Guestbook.class);
    ObjectifyService.register(Greeting.class);
  }

  public void contextDestroyed(ServletContextEvent event) {
    // App Engine does not currently invoke this method.
  }
}
このファイルでは、次の項目で作成する予定のGreetingモデルクラスとGuestbookモデルクラスを参照しています。
最後に、guestbook/src/main/webapp/WEB-INF/内にあるweb.xmlを編集し、<web-app>内に以下の行を追加して JSP ヘルパーを設定します:
<filter>
  <filter-name>ObjectifyFilter</filter-name>
  <filter-class>com.googlecode.objectify.ObjectifyFilter</filter-class>
</filter>
<filter-mapping>
  <filter-name>ObjectifyFilter</filter-name>
  <url-pattern>/*</url-pattern>
</filter-mapping>
<listener>
  <listener-class>com.example.guestbook.OfyHelper</listener-class>
</listener>
データモデルクラスを作成する
Objectifyを使用して、datastore entitiesを表すインスタンスをコード内に持つクラスを作成します。 Objectify does the work of translating these Java objects to datastore entities.
ユーザーによって投稿されたメッセージを表すGreeting クラスを作成します。
guestbook/src/main/java/com/example/guestbook/内で、以下の内容の Greeting.java という名前のファイルを作成してください:
package com.example.guestbook;
import com.googlecode.objectify.annotation.Entity;
import com.googlecode.objectify.annotation.Id;
import com.googlecode.objectify.annotation.Index;
import com.googlecode.objectify.annotation.Parent;
import com.googlecode.objectify.Key;
import java.lang.String;
import java.util.Date;
import java.util.List;
/**
* The @Entity tells Objectify about our entity. We also register it in {@link OfyHelper}
* Our primary key @Id is set automatically by the Google Datastore for us.
*
* We add a @Parent to tell the object about its ancestor. We are doing this to support many
* guestbooks. Objectify, unlike the AppEngine library requires that you specify the fields you
* want to index using @Index. Only indexing the fields you need can lead to substantial gains in
* performance -- though if not indexing your data from the start will require indexing it later.
*
* NOTE - all the properties are PUBLIC so that can keep the code simple.
**/
@Entity
public class Greeting {
@Parent Key<Guestbook> theBook;
@Id public Long id;
public String author_email;
public String author_id;
public String content;
@Index public Date date;
/**
* Simple constructor just sets the date
**/
public Greeting() {
date = new Date();
}
/**
* A connivence constructor
**/
public Greeting(String book, String content) {
this();
if( book != null ) {
theBook = Key.create(Guestbook.class, book); // Creating the Ancestor key
} else {
theBook = Key.create(Guestbook.class, "default");
}
this.content = content;
}
/**
* Takes all important fields
**/
public Greeting(String book, String content, String id, String email) {
this(book, content);
author_email = email;
author_id = id;
}
}
ゲストブック全体を表す Guestbook クラスも必要です。
この例ではデータストア内で明示的にGuestbookオブジェクトを作成していませんが、 Greetingオブジェクト用のデータストアキーの一部としてこのクラスを使用しています。
ここでは、キーを定義してゲストブック内の全ての挨拶文を単一のデータストアトランザクション内で更新できるようにする方法を例示しています。
以下の内容でGuestbook.javaという名前のファイルを作成してください。:
package com.example.guestbook;
import com.googlecode.objectify.annotation.Entity;
import com.googlecode.objectify.annotation.Id;
/**
* The @Entity tells Objectify about our entity. We also register it in
* OfyHelper.java -- very important.
*
* This is never actually created, but gives a hint to Objectify about our Ancestor key.
*/
@Entity
public class Guestbook {
@Id public String book;
}
JSP テンプレートに挨拶文とフォームの処理を追加する
guestbook/src/main/webapp内にある guestbook.jspを編集します。コード上部でインポートするために以下の行を追加してください:
<%@ page import="com.example.guestbook.Greeting" %> <%@ page import="com.example.guestbook.Guestbook" %> <%@ page import="com.googlecode.objectify.Key" %> <%@ page import="com.googlecode.objectify.ObjectifyService" %>
<form action="/guestbook.jsp" method="get">行のすぐ上に、以下のコードを追加します:
<%
// Create the correct Ancestor key
Key<Guestbook> theBook = Key.create(Guestbook.class, guestbookName);
// Run an ancestor query to ensure we see the most up-to-date
// view of the Greetings belonging to the selected Guestbook.
List<Greeting> greetings = ObjectifyService.ofy()
.load()
.type(Greeting.class) // We want only Greetings
.ancestor(theBook) // Anyone in this book
.order("-date") // Most recent first - date is indexed.
.limit(5) // Only show 5 of them.
.list();
if (greetings.isEmpty()) {
%>
<p>Guestbook '${fn:escapeXml(guestbookName)}' has no messages.</p>
<%
} else {
%>
<p>Messages in Guestbook '${fn:escapeXml(guestbookName)}'.</p>
<%
// Look at all of our greetings
for (Greeting greeting : greetings) {
pageContext.setAttribute("greeting_content", greeting.content);
String author;
if (greeting.author_email == null) {
author = "An anonymous person";
} else {
author = greeting.author_email;
String author_id = greeting.author_id;
if (user != null && user.getUserId().equals(author_id)) {
author += " (You)";
}
}
pageContext.setAttribute("greeting_user", author);
%>
<p><b>${fn:escapeXml(greeting_user)}</b> wrote:</p>
<blockquote>${fn:escapeXml(greeting_content)}</blockquote>
<%
}
}
%>
<form action="/sign" method="post">
<div><textarea name="content" rows="3" cols="60"></textarea></div>
<div><input type="submit" value="Post Greeting"/></div>
<input type="hidden" name="guestbookName" value="${fn:escapeXml(guestbookName)}"/>
</form>
ユーザーがページを読み込んだ時、このテンプレートでは自分のキーに同じ Guestbookを使っている全てのGreetingエントリーに対してデータストアクエリーを実行します。
このクエリーは日付が新しい順("-date")に並び替えられ、取得する結果は最新の挨拶文5つに制限されます。
テンプレートの残りの部分では、取得結果をHTMLとして表示し、またユーザーが新しい挨拶文を投稿するのに使用できるフォームを描写しています。
クエリーについての詳細を学ぶにはデータストアクエリを参照してください。
フォームの処理を行うサーブレットを作成する
このウェブフォームでは/sign URLへHTTP POSTリクエストを送信します。では、これらのリクエストを処理するサーブレットを作成しましょう。
guestbook/src/main/java/com/example/guestbook内で、SignGuestbookServlet.javaという名前のファイルを作成して中身を以下のようにしてください:
package com.example.guestbook;
import com.google.appengine.api.datastore.DatastoreService;
import com.google.appengine.api.datastore.DatastoreServiceFactory;
import com.google.appengine.api.datastore.Entity;
import com.google.appengine.api.datastore.Key;
import com.google.appengine.api.datastore.KeyFactory;
import com.google.appengine.api.users.User;
import com.google.appengine.api.users.UserService;
import com.google.appengine.api.users.UserServiceFactory;
import java.io.IOException;
import java.util.Date;
import javax.servlet.http.HttpServlet;
import javax.servlet.http.HttpServletRequest;
import javax.servlet.http.HttpServletResponse;
import com.googlecode.objectify.ObjectifyService;
/**
* Form Handling Servlet
* Most of the action for this sample is in webapp/guestbook.jsp, which displays the
* {@link Greeting}'s. This servlet has one method
* {@link #doPost(<#HttpServletRequest req#>, <#HttpServletResponse resp#>)} which takes the form
* data and saves it.
*/
public class SignGuestbookServlet extends HttpServlet {
// Process the http POST of the form
@Override
public void doPost(HttpServletRequest req, HttpServletResponse resp) throws IOException {
Greeting greeting;
UserService userService = UserServiceFactory.getUserService();
User user = userService.getCurrentUser(); // Find out who the user is.
String guestbookName = req.getParameter("guestbookName");
String content = req.getParameter("content");
if (user != null) {
greeting = new Greeting(guestbookName, content, user.getUserId(), user.getEmail());
} else {
greeting = new Greeting(guestbookName, content);
}
// Use Objectify to save the greeting and now() is used to make the call synchronously as we
// will immediately get a new page using redirect and we want the data to be present.
ObjectifyService.ofy().save().entity(greeting).now();
resp.sendRedirect("/guestbook.jsp?guestbookName=" + guestbookName);
}
}
このサーブレットは、ユーザーが投稿した挨拶文のためのPOSTハンドラです。
受信したリクエストから 挨拶文(content)を取り出して、Greetingエンティティとしてデータストアに保存します。
Greetingエンティティのプロパティには、投稿の中身・投稿が作成された日付・ユーザーがログインしているのであればそのIDとEメールアドレスが含まれます。
App Engineにおけるエンティティの詳細情報については、エンティティとプロパティとキーを参照してください。
最後に、guestbook/src/main/webapp/WEB-INF/内の web.xmlを編集し、
新規に作成したサーブレットにURLを紐付けるようにしてください。最終バージョンは以下のようになります:
<?xml version="1.0" encoding="UTF-8"?>
<web-app version="2.5" xmlns="http://java.sun.com/xml/ns/javaee"
xmlns:xsi="http://www.w3.org/2001/XMLSchema-instance"
xsi:schemaLocation="http://java.sun.com/xml/ns/javaee http://java.sun.com/xml/ns/javaee/web-app_2_5.xsd">
<servlet>
<servlet-name>sign</servlet-name>
<servlet-class>com.example.guestbook.SignGuestbookServlet</servlet-class>
</servlet>
<servlet-mapping>
<servlet-name>sign</servlet-name>
<url-pattern>/sign</url-pattern>
</servlet-mapping>
<welcome-file-list>
<welcome-file>guestbook.jsp</welcome-file>
</welcome-file-list>
<filter>
  <filter-name>ObjectifyFilter</filter-name>
  <filter-class>com.googlecode.objectify.ObjectifyFilter</filter-class>
</filter>
<filter-mapping>
  <filter-name>ObjectifyFilter</filter-name>
  <url-pattern>/*</url-pattern>
</filter-mapping>
<listener>
  <listener-class>com.example.guestbook.OfyHelper</listener-class>
</listener>
</web-app>
アプリをテストする
アプリのビルドと実行を行うためにデベロップメントサーバーを再起動します:
mvn appengine:devserver
ブラウザでアプリを開きます:
挨拶文を投稿してみてください。また、ログインした状態とログインしてない状態の両方で挨拶文を投稿してみてください。
必須インデックスを作成する
あなたのアプリがデータストアを使用している場合、デベロップメントサーバ上でアプリを動作すると、デベロップメントサーバは製品版 App Engineで操作するのに必要なデータストアインデックスを自動的に作成します。
これらのインデックスはguestbook/target/guestbook-1.0-SNAPSHOT/WEB-INF/appengine-generated/datastore-indexes-auto.xml内に生成されます。
また、同じ場所にlocal_db.binというファイルがあるのにも気づくでしょう:
これは、デベロップメントサーバがサーバセッション間でアプリデータの一貫性を保持するためのローカルストレージです。
あなたのアプリをアップロードする際に、datastore-indexes-auto.xmlファイルは一緒に自動的にアップロードされます。
local_db.binはアップロードされません。
インデックスに関する全情報は、データストアインデックスを参照してください。
これで、Google アカウントを使ってユーザーを認証し、ユーザーがメッセージを送信することができ、他のユーザーが残したメッセージを表示するゲストブックアプリケーションができました。
残るはアプリケーションのアップロードだけです...